Puzzle Cube Project
STEP 1 - DRAFTING

This is a photo of my first sketches. It is the planning for many possible cube combinations ranging from three to six cubes.
STEP 2 - PLANNING and DESIGNING
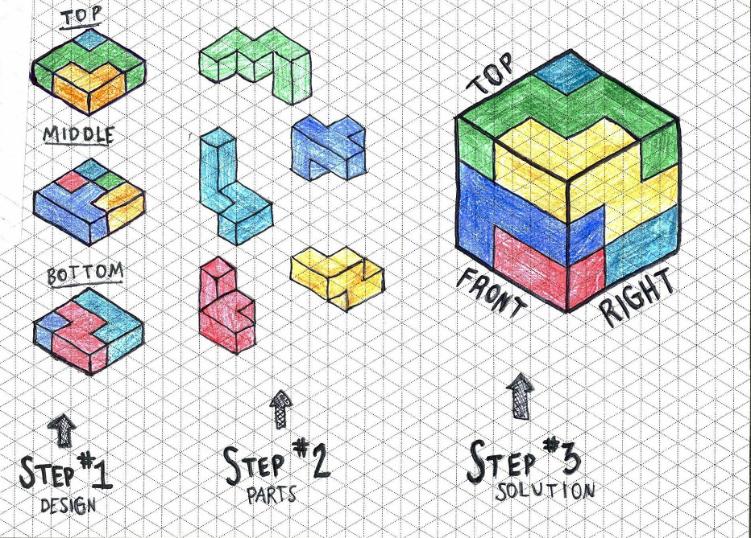
This is the second step of my sketching. I showed the different layers of the puzzle cube, the individual parts, and what the final solution would look like.
STEP 3 - CAD MODELING OF PUZZLE PIECES

Here is a rendered image of the first of the five puzzle cube pieces created in Autodesk Inventor. The goal of this is to provide a realistic image, so the part file is placed in a realistic environment is in perspective view.

And here are the rest of them!


STEP 4 - ASSEMBLY

Here is a rendered image of the assembled cube from Autodesk Inventor.
STEP 5 - EXPLODED VIEW

This CAD image shows each piece individually as if they have been separated from the final solution (see step 4).
STEP 6 - PROTOTYPE PIECES

This is a photograph of the final pieces. They are painted and slightly sanded for a perfect finish. Please note that the colors of the computer-drafted pieces are not the same as these here. The virtually-designed pieces were colored random colors for distinction only.
STEP 7 - PROTOTYPE SOLUTION

Now this is a photograph of the final solution! All of the pieces fit nicely and it is ready to be stored in the container for distribution.

This is a photo of our box for the puzzle cube. It is perfected for our cube and it is made so it is ready to be sold today!
STEP 8 - OUR GROUP IN ACTION
|


STEP 9 - PROJECT ANIMATION